Archive note — reviewed September 28, 2026. This is a historical guide recovered from an August 26, 2019 capture. The product opinions and first-person experiences belong to the original author; prices, rankings, availability, specifications and testing claims have not been independently reverified. Unsafe raw-oyster advice has been replaced with the dated safety notes below.
Oyster safety
Cook oysters before eating them. Raw or undercooked oysters can cause serious illness, and an oyster carrying harmful germs may look, smell and taste normal. Hot sauce and lemon juice do not make raw oysters safe. Source: CDC — Vibrio and Oysters.
Historical oyster shucking guide
We have been eating lots of oysters lately. My family loves them. I am a sea food fan but I really am kind of lazy when it comes to eating. My favorite foods are usually those that I can shovel on to a spoon and eat all of it. Or, like kimbap, I can just grab with some chopsticks and eat. That rules out most sea food, at least in Korea. Most of the sea food here is prepared and served fresh and with all the bones in.
The original author researched how to open oyster shells and documented the shucking process below. Shucking is preparation for cooking; it does not make oysters safe to eat raw.
About the Oyster
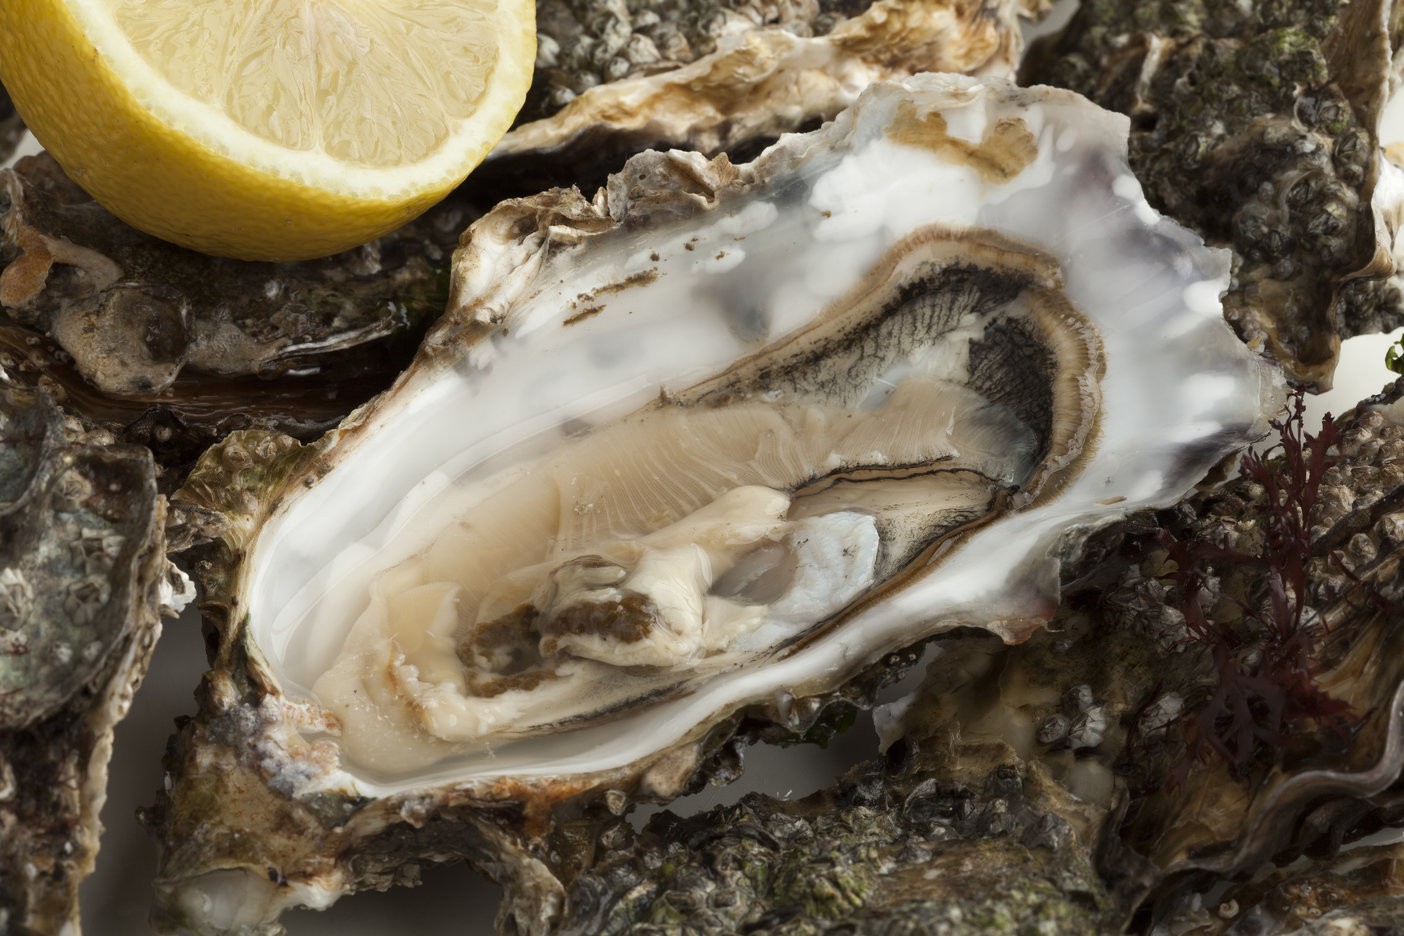
First of all lets take a look at the oyster. If you look at it closely there is a kind of flat side and a more round side. The round side is the bottom. That is where the oyster is and the oyster liquor are hanging out. The oyster is connected to the top and bottom shell.
Selecting and storing oysters — September 2026
Look for shellfish tags or package labels carrying the processor’s certification information. Reject cracked or broken shells and live oysters that do not close when tapped. These checks do not detect every harmful germ or establish that an oyster is safe to eat raw. Keep seafood refrigerated at 40°F (4°C) or below and use it within two days of purchase, or freeze it for longer storage. Sources: FDA — Selecting and Serving Fresh and Frozen Seafood Safely and CDC — Vibrio and Oysters.
Shucking the shuck
When I first heard the word shuck, I was a little confused but according to the online dictionary shuck in noun form is the shell of an oyster or clam and shuck the verb means to remove the shuck from. I love how in English we can make nouns into verbs very easily. So remember that shuck can be the shell of either an oyster or a clam and to shuck is the process of shucking the shuck from the oyster or clam. 🙂
How to Open an Oyster (Shucking an Oyster)
Cleaning the outside of a shell removes surface dirt; it does not make the oyster safe to eat raw. Keep raw oysters and their juices away from ready-to-eat food. Wash hands after handling them, and clean utensils and work surfaces before preparing cooked food. Protect open cuts from raw seafood and its juices. Sources: CDC — Preventing Vibrio Infection and FDA — Selecting and Serving Fresh and Frozen Seafood Safely.
There are a few different processes to actually opening the shell and some people really take their shucking technique serious but I am going to show you the easiest method I know of.
Another good word with oysters is oyster liquor. This is that salt watery liquid that the oyster is living in that is inside the shell. It can be used or discarded.
The tools you will need for this activity are:
- A stable work surface and careful handling
- Shucking Knife (I review a few of these below)
- Appropriate protective gloves; follow the glove and oyster-knife makers’ instructions. Cut resistance is not a guarantee against punctures or injury.
- A thick towel that you don’t mind getting a little muddy
Before step 1, protect your hands and keep fingers and your body out of the blade’s path. The following is the original author’s general shucking description; follow your equipment’s safety instructions and stop if the shell cannot be opened with controlled pressure.
Step 1 – fold over your towel once to create a nice padded surface (hot dog fold). Lay your oyster shell down with the curvy side down.
Step 2 – find the back of the oyster where there should be a little lip where the bottom shell sticks out slightly and the top shell curves in to form a little hinge. This part of the shell is a little more narrow than the other flatter side.
Step 3 – fold over part of the towel so it is covering the front side of the shell (not the hinge part) and hold it in place with one hand.
Step 4 – tilt the oyster back with the opposite hand so that the hinge is facing upward. Insert the tip of the oyster knife into the oyster hinge and wiggle it in while applying a little pressure. Be careful not to jam it in too far.
Step 5 – once the tip has engaged the hinge, carefully turn the knife away from you while keeping your hands outside its path to open the shell. Do not force the blade or rely on a fixed insertion depth.
Step 6 – take your shucking knife back out and insert it horizontally scraping the bottom of the top shell to cut the oyster muscle. Then remove the top shell.
Step 7 – there may be a little mud or left over shell crumbs on the side of the bottom oyster, wipe those off gently
Step 8 – with your shucking knife again run the blade under the bottom of the oyster to cut it from the bottom shell
Step 9 – remove the oyster for your chosen cooked preparation. For shucked oysters, CDC gives boiling for at least three minutes as one cooking method; its guidance also lists frying, broiling and baking methods. Follow the complete method for the preparation you choose. Source: CDC — Preventing Vibrio Infection.
Historical oyster-knife opinions
Use a purpose-made oyster knife and follow its maker’s safety instructions. Oyster knives can still cause injury even when their cutting edges are not sharpened like a chef’s knife.
Archived product commentary: The following three descriptions reproduce the original author’s opinions from the August 26, 2019 capture. They are unverified historical claims, including judgments about price, manufacturing origin, strength and suitability; they are not current buying recommendations.
1. The Victorinox 2 3/4 Inch Hook tip
This knife is sturdy and has a great grip. The red color handle is comfortable and feels strong. The price is reasonable and amazon customers seem to really love it. Victorinox has a few good products that I like.
Pros of this knife
The good thing about this knife is that is has a really good tip. From the shucking process we discussed earlier, you can see that the tip is very important. Also the small overall size and good grip make this an easy and portable option.
Cons of this knife
Might not be quite strong enough for bulk usage. I would recommend this knife for personal use on normal sized oysters. But if you want to tackle bulk with large oysters then you might want to find a stronger oyster knife.
2. The Oyster Knife by HiCoup
This is a really pretty knife. The quality is good and it feels nice. This is a good knife if you are looking for a groomsman gift.
Pros of this shucker
The best thing about this knife is the quality and the look. It is very strong and sturdy. The wooden handle design and curve are very comfortable. When I think of a good knife for shucking, I think of this one. The price is also reasonable.
Cons of this shucking knife
The only bad thing about this knife is that it is a little thick compared to the other ones. If you are opening small oysters then the blade might not fit into the hinge.
3. The Wusthof 4281 Oyster Knife
This guy is a beast. It is German made with a fat and short blade. It is very strong and good for all types of oyster shells. The best oyster shucker out there.
Pros of this one
This is a great overall oyster knife. The handle is strong and sturdy, the blade is short and wide. It is easy to get into large and small sized oysters with this knife.
Cons of this knife
The price. In my opinion it is over priced. But if you want a quality oyster knife that you don’t have to worry about breaking and having to return, then it could be worth it for you.
Historical sauces for cooked oysters
The original sauce ideas below may accompany thoroughly cooked oysters. They do not disinfect raw shellfish. Keep sauces chilled until serving.
1 Cucumber Mignonette Sauce:
1 cup rice wine vinegar
1 tablespoon of sugar
1 shallot finely chopped
1-inch piece fresh ginger peeled and chopped
1/2 cucumber, peeled and finely chopped
2 pinches of ground black pepper
1 chili pepper finely chopped
Combine ingredients together in a bowl, mix slightly and refrigerate for one hour.
2 Tabasco Cocktail Sauce
1/2 cup chili sauce
1/4 teaspoon sugar
1/2 teaspoon salt
1/2 teaspoon black pepper
Juice from one lemon squeezed
4 drops Tabasco
tiny splash of Worcestershire Sauce
2 minced garlic cloves
Combine the ingredients in a bowl, mix, cover and refrigerate for at least an hour before serving.
3 Our Quick Chogochujang Recipe
We make this by combining soysauce with a little vinegar and gochujang (red pepper paste). This is a type of chogojujang sauce. I really like this one the best. But to be honest I don’t eat this with every oyster. I usually like to do every other oyster or even every third oyster. I like to get the oyster taste flavor and then a little bit of this hot sauce. Warning this sauce might be spicy for you so be sure to test just a little first.
Serving and historical disclosure
Keep perishable seafood and sauces refrigerated until serving; discard them if left out for more than two hours, or one hour above 90°F (32°C). Source: FDA — Selecting and Serving Fresh and Frozen Seafood Safely.
The original article carried an Amazon commission disclosure and invited purchase feedback in its comments. Its purchase links and comment submission feature are not active in this recovered article.